Posts

ESPeriments with Nginx (Part I)

Image
*rises from coffin* I have returned from the dead insanely-busy (I know that’s not a real word) ! Hope you guys have had a swell time. Been doing lots of work on stuff,  both personal and professional so I’ve had very little time to settle down and write. Luckily I just completed a milestone project so I had some time to kill. *sips Pina Colada* Today’s post will be a bit lengthy – to make up for lost time . But first, some context. I spent most of January working on a small IoT sort of solution. I won’t go into specifics, but the salient points involved using an ESP12-E module to make requests to a local server (a server on a local network not the internet). For the uninitiated, the ESP12-E module is a cheap (~$3) WiFi-enabled microcontroller…thing. It runs at 80MHz, has up to 4MBytes of flash space and has ~8 GPIOs. It is also Arduino-compatible, so you can get up to speed fairly quickly with it. There are excellent guides on the net describing how to wire the thing up, how ...

Testing out the IoT pHAT

Image
Hail, people! Continuing on from last time, I had a little time to muck about with the IoT pHAT to try to get a general idea of how well it worked. What I did was to test out WiFi only, BT only, then WiFi + BT. I’ve described them as Tests 1, 2 and 3 respectively below. These tests were carried out on a Raspberry Pi Model B+ running the 2016-11-25 version of the Raspbian Jessie Lite distribution. Test 1 For the WiFi only test, I placed the pHAT on a B+ and edited the /etc/wpa_supplicant/wpa_supplicant.conf file to (auto)connect to my home WiFi network. Did a reboot, and voila, the ‘raspberrypi’ entry showed up in the router’s DHCP table. I was able to login via SSH and transfer a few files using WinSCP. Overally it performed flawlessly here – the connection was rock solid and performed satisfactorily. I didn’t run any iperf tests though – this is because I don’t intend to use the pHAT for any applications where throughput is an issue anyway. But I don’t expect it to be (signific...

Revisiting The RedBearLab IoT pHAT

Howdy, folks. Hope everyone has been okay and has had a good week. Its Friday again! So my first proper post of 2017 is about the IoT pHAT from RedBearLab, which (if you can recall) I was supposed to review. Due to issues with the HAT firmware that was not possible for quite some time. In the early hours of January 12th, a firmware update was made available which purportedly fixed the issues. On testing it myself, I found this to be the case. So let’s talk about how to get up and running with it. Typically, you’d want to start at this page , but there’s alot of information in there, some of which (thus far) doesn’t seem necessary anymore, so I’m going to try to keep it as linear as I can. First off, you’ll need an IoT pHAT – not surprisingly. I backed their crowdfunding campaign, but you can now buy one on the RedBearLab store if you don’t already have one. You can get one of two versions – one with headers presoldered and one without headers presoldered. I chose the former version....

Happy New Year!

Hello there! Its been a while. Happy New Year everyone! Here’s wishing us all a happy, healthy and prosperous one. I’m sorry I’ve been gone for so long. Got tied up with a thousand and one things, and time just got away from me. As part of my catch-up efforts, The fourth Element14 post is up and is available here . In addition, I have a small hardware project in the works and should be talking about that soon. I’m also expecting some new hardware and will likely be talking about that quite a bit in the weeks to come. All in all, I’m excited about 2017 and I hope you are too. Once again, Happy New Year! See you shortly..

Third Element14 Post Up!

Hello all, Hope everyone has had a good week thus far. The Weekend is here folks! *whoops* Ahem. The Third Element14 post is up and can be viewed here . Enjoy (the post and the weekend)! *gone with the weekend*

Debison….or, Debian + Edison

Image
I must begin by apologizing for the title of today’s post…I’ve been reading some weird Victorian-style literature and was trying my hand at naming things. Suffice to say it won’t be happening again………anytime soon. Like I mentioned last time, I’m currently keeping busy with an Intel Edison Breakout for Arduino kit. The thing I needed to do was to get an OS up and running on the board. I’m glad to announce that I’ve succeeded (Igor, he’s alive!!!). Here’s how. First off, the basic template for getting this done is available here . For some unfathomable reason, when you get to the part titled “Customize Kernel (Optional)”, things get weird. At least they did for me. YMMV. Note that if you simply want Debian on the Edison and are not infact customizing the kernel, then you need not worry about this part. Simply skip to here . If you’re taking the red pill customizing the kernel , step right this way. First off, take a look at this , specifically points 1 and 2 as they could easily t...

End, Edd and Edison

Image
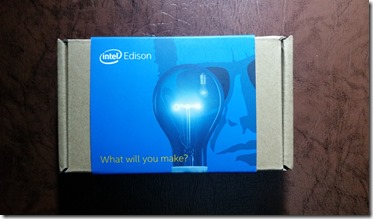
Hello Friend(s). Been a while – been busy with the end of the compulsory Youth Service year, which concluded (for me) a few hours ago. That’s right folks, I’m done with NYSC and free as a bird. Its been a great, memorable year….. As mentioned in my previous post , I received an Intel Edison Breakout for Arduino kit courtesy of Element14. This happened a month or two ago, but I barely had time to really settle down with it until recently. I will be hosting a number of blog posts on the Element14 Intel Community, detailing the ins and outs of building a vehicular robot capable of being controlled over WiFi. The first post, which is an unboxing, can be found here . The Intel Edison is a pretty capable SBC – it has 1GB of RAM and two Atom CPU cores running at 500MHz each, and a Quark microcontroller running at a 100MHz. The onboard microcontroller is no BeagleBone PRU, but runs an RTOS called ViperOS, offering (presumably) (hard) real-time capabilities to the Edison. That’s something I’...