Posts

I'm Okay!

Hello Friend. I realize its been almost a year since my last post. And what a time its been. Many life changes have happened between now and then, but maybe most germane is the fact that I moved to another country. This happened late last year, and I've spent most of the intervening time trying to synchronize. In any case, I've had some luck with that and so I hope to pick up where we left off. So, hello 2018. Its horrendously late, but here it is. I hope everyone has been alright and things are good. With regards to my plans, I actually started penning a short series on practical Encryption last year. I haven't quite finished, but the plan is to put it up as soon as I do. I also intend to expand the scope of the posts here. I won't be doing much hardware work for the nearest foreseeable future, so most of my posts will be more software-centric. I might also occasionally post non-embedded/non-software thingies as well. For example, I discovered that I could install ...
ESPeriments with Nginx (Part III)

Image
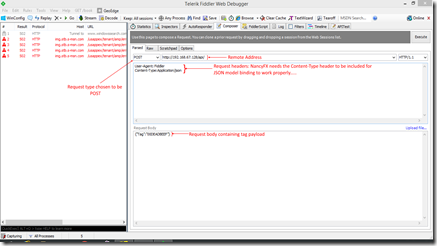
Ave! This is the concluding part of the ESPeriments with Nginx series, where we’ll talk about testing out the HTTPS bits and wiring things up on the ESP8266 end to use HTTPS also. First off, we’ll need to test out the HTTPS API endpoint. Before doing this, I’ll assume the server (web) app is running and the Nginx proxy has been suitably configured (and includes the HTTPS directives as discussed in the previous post). Essentially, we’ll need to simulate HTTP and HTTPS requests to the API endpoint and see the response behavior and codes. There are an eclectic mix of tools to do this sort of work (e.g Postman, etc), but we’ll be using Fiddler by Telerik, which (IMHO) is a solid piece of kit. We’ll use Fiddler’s Composer tab to create a suitable request to the API endpoint. Essentially, the server (web) app is designed to receive a POST request whose payload is the JSON representation of a request object – which should contain a field called “Tag” for purposes of illustration. Here’s a ...

ESPeriments with Nginx (Part II)

Image
Aaaaaaand we’re back! Right, so we’ll kick off from the last post, where we’d gotten the basic stuff up and running. The next thing to do was to secure the server with SSL. This was necessary because it was necessary to bulletproof some parts of the system,specifically the API endpoint. A hypothetical attacker could seek to compromise the API-bound authentication process by performing a man-in-the-middle (MITM) attack where he’d/she’d have a machine pretend to be the auth server, and would configure the fake machine to respond favorably to any tag of their choice, and possibly even deny other tags. With SSL, the client would be able to verify the identity of the remote auth server, which would be a huge plus. Note that there are other ways of attacking such a system, but I will not enumerate them here. This scenario naturally provided two salient points: one, the API endpoint absolutely needs SSL. It then stood to reason that (at least initially) the API endpoint would need to be con...

ESPeriments with Nginx (Part I)

Image
*rises from coffin* I have returned from the dead insanely-busy (I know that’s not a real word) ! Hope you guys have had a swell time. Been doing lots of work on stuff,  both personal and professional so I’ve had very little time to settle down and write. Luckily I just completed a milestone project so I had some time to kill. *sips Pina Colada* Today’s post will be a bit lengthy – to make up for lost time . But first, some context. I spent most of January working on a small IoT sort of solution. I won’t go into specifics, but the salient points involved using an ESP12-E module to make requests to a local server (a server on a local network not the internet). For the uninitiated, the ESP12-E module is a cheap (~$3) WiFi-enabled microcontroller…thing. It runs at 80MHz, has up to 4MBytes of flash space and has ~8 GPIOs. It is also Arduino-compatible, so you can get up to speed fairly quickly with it. There are excellent guides on the net describing how to wire the thing up, how ...

Testing out the IoT pHAT

Image
Hail, people! Continuing on from last time, I had a little time to muck about with the IoT pHAT to try to get a general idea of how well it worked. What I did was to test out WiFi only, BT only, then WiFi + BT. I’ve described them as Tests 1, 2 and 3 respectively below. These tests were carried out on a Raspberry Pi Model B+ running the 2016-11-25 version of the Raspbian Jessie Lite distribution. Test 1 For the WiFi only test, I placed the pHAT on a B+ and edited the /etc/wpa_supplicant/wpa_supplicant.conf file to (auto)connect to my home WiFi network. Did a reboot, and voila, the ‘raspberrypi’ entry showed up in the router’s DHCP table. I was able to login via SSH and transfer a few files using WinSCP. Overally it performed flawlessly here – the connection was rock solid and performed satisfactorily. I didn’t run any iperf tests though – this is because I don’t intend to use the pHAT for any applications where throughput is an issue anyway. But I don’t expect it to be (signific...

Revisiting The RedBearLab IoT pHAT

Howdy, folks. Hope everyone has been okay and has had a good week. Its Friday again! So my first proper post of 2017 is about the IoT pHAT from RedBearLab, which (if you can recall) I was supposed to review. Due to issues with the HAT firmware that was not possible for quite some time. In the early hours of January 12th, a firmware update was made available which purportedly fixed the issues. On testing it myself, I found this to be the case. So let’s talk about how to get up and running with it. Typically, you’d want to start at this page , but there’s alot of information in there, some of which (thus far) doesn’t seem necessary anymore, so I’m going to try to keep it as linear as I can. First off, you’ll need an IoT pHAT – not surprisingly. I backed their crowdfunding campaign, but you can now buy one on the RedBearLab store if you don’t already have one. You can get one of two versions – one with headers presoldered and one without headers presoldered. I chose the former version....

Happy New Year!

Hello there! Its been a while. Happy New Year everyone! Here’s wishing us all a happy, healthy and prosperous one. I’m sorry I’ve been gone for so long. Got tied up with a thousand and one things, and time just got away from me. As part of my catch-up efforts, The fourth Element14 post is up and is available here . In addition, I have a small hardware project in the works and should be talking about that soon. I’m also expecting some new hardware and will likely be talking about that quite a bit in the weeks to come. All in all, I’m excited about 2017 and I hope you are too. Once again, Happy New Year! See you shortly..

Third Element14 Post Up!

Hello all, Hope everyone has had a good week thus far. The Weekend is here folks! *whoops* Ahem. The Third Element14 post is up and can be viewed here . Enjoy (the post and the weekend)! *gone with the weekend*

Debison….or, Debian + Edison

Image
I must begin by apologizing for the title of today’s post…I’ve been reading some weird Victorian-style literature and was trying my hand at naming things. Suffice to say it won’t be happening again………anytime soon. Like I mentioned last time, I’m currently keeping busy with an Intel Edison Breakout for Arduino kit. The thing I needed to do was to get an OS up and running on the board. I’m glad to announce that I’ve succeeded (Igor, he’s alive!!!). Here’s how. First off, the basic template for getting this done is available here . For some unfathomable reason, when you get to the part titled “Customize Kernel (Optional)”, things get weird. At least they did for me. YMMV. Note that if you simply want Debian on the Edison and are not infact customizing the kernel, then you need not worry about this part. Simply skip to here . If you’re taking the red pill customizing the kernel , step right this way. First off, take a look at this , specifically points 1 and 2 as they could easily t...

End, Edd and Edison

Image
Hello Friend(s). Been a while – been busy with the end of the compulsory Youth Service year, which concluded (for me) a few hours ago. That’s right folks, I’m done with NYSC and free as a bird. Its been a great, memorable year….. As mentioned in my previous post , I received an Intel Edison Breakout for Arduino kit courtesy of Element14. This happened a month or two ago, but I barely had time to really settle down with it until recently. I will be hosting a number of blog posts on the Element14 Intel Community, detailing the ins and outs of building a vehicular robot capable of being controlled over WiFi. The first post, which is an unboxing, can be found here . The Intel Edison is a pretty capable SBC – it has 1GB of RAM and two Atom CPU cores running at 500MHz each, and a Quark microcontroller running at a 100MHz. The onboard microcontroller is no BeagleBone PRU, but runs an RTOS called ViperOS, offering (presumably) (hard) real-time capabilities to the Edison. That’s something I’...

Not a First Impressions Post

Hello! This post was supposed to be the promised "First Impressions" post for the IoT pHAT from RedBear we unboxed recently. Sadly, I will be holding that post off for a little while. Why, you ask? Basically, it comes down to the current setup process. Apparently there are certain issues with the Pi's firmware which are to be fixed in the next release. While the pHAT is currently usable, I know whatever process I'd describe will soon become redundant so I'm holding off for the next Raspbian release (should be out really soon) to do everything all at once. In the meantime, I recently got my hands on an Intel Edison Kit for Arduino, so I should post some stuff about that really soon. Perhaps even do a First Impressions post about that instead? ;-)

Revisiting RF24 on Ubilinux

Image
[TL;DR: In summary, we need to modify the “configure” script a little bit, then run the configure command with certain arguments, then edit the Makefile (comment three lines out) then run make install –B. Details/specifics below.] Hello! Although this post should be about the first impressions of the IoT pHAT unboxed last time, my attention was recently drawn to major changes in the RF24 compilation process, so I decided to revisit it and leave the IoT pHAT post for next time. As before, the goal is to be able to use nRF24L01+ radios on Intel Galileo boards running the Ubilinux distro. We’ll be focusing on using the MRAA library as the HAL/backend (recall that RF24 can use SPIDEV or the bcm2708 library as well, the latter supported only on Raspberry Pi boards). To get started, MRAA itself must naturally be installed. To do this, you’ll want to have the following installed: clang, cmake, python-dev, build-essential (things like make and all that). A full list of dependencies is prov...

Unboxing the RedBearLab IoT pHat

Image
Hello! Been a while – I hope the winds of fortune have been blowing favorably in your various directions. Been rather busy with work myself, so I apologize for the long silence. As a reparation, today will be my first ever unboxing post! In my never-ending search for cheap yet functional stuff, A few months ago I began following a certain project on Hackaday.io , which combined two of my favorite things at the time – the ESP8266 WiSoc and the Raspberry Pi (Zero). Essentially, the project was exploring a means of using the ESP8266 as a WiFi peripheral for the Pi with full OS support – so theoretically you’d hook up the ESP8266 (specifically the ESP07/12 models as I recall), load up whatever kernel module was needed, and you’d get a wlan0 device which you could use to do awesome. At the end, it ended up working and the board designs and everything needed are up there on Hackaday.io. However that guy ended up with a ~$20 board, which is like 4x the cost of a Pi Zero. Shortly after that,...

Nancy

Image
Hello all, I’m hoping everyone has had a good week. Tis Thursday folks, the weekend’s a’comin’! I also realized that I barely blog about anything C#, which is a shame since the blog’s tagline implies I should, so this week I’m going to talk about Nancy. I’ll take a rain check on the Alchemy thing though… NancyFx or Nancy for short is a lightweight, server-side web framework for the .NET framework. Basically, it comes into play when you’re trying to build a web-application with server-side smarts, such as a data-bound application (where data is stored, queried and retrieved), building web APIs (web apps returning XML or JSON data in response to requests) and things like that. Granted, there are tons of neat frameworks to do this for every language – there’s Django for Python, there’s ASP.NET and ASP.NET MVC for the dotNet framework itself, etc. However, ASP.NET and ASP.NET MVC are rather heavy and (for me) rather difficult and clunky to deploy on non-Windows hosts. If you’re going t...

Getting Started with Logic Analyzers and Pulseview

Image
Hey all, Been a while. Hope you’ve been up to no good, hm? A couple of days ago, I had to do some low-level I2C work on a bare-metal ATMega328P. Digging out the datasheet, I cobbled a simple I2C driver together, the purpose of which was to permit me write a driver for the particular peripheral which would call the lower-level functions the driver provided (i.e things like i2c_start(), i2c_stop(), i2c_address(), etc etc). When I finished the I2C driver, I tested it out with an MMA8452Q I had lying about and it seemed to work just fine. Believing everything to be dandy, I went ahead and wrote the peripheral driver for the component I was working with. And that was when the funny stuff started. To cut that long story short, it wouldn’t work right when deployed to the hardware. At all. I was in a bit of a bind – the code looked great, no errors no nothing, so it was time to look at the hardware/wire-level end of things. Logic analyzers (in my limited understanding) are tools/instrume...